为 Android 平台编译
参见
本页面描述的是如何从源码编译 Android 编辑器和导出模板二进制文件。如果你想要将项目导出到 Android,请移步《为 Android 导出》。
注意
对于大多数情况, 使用内置部署程序和导出模板就足够了. 手动编译Android APK对于部署程序的自定义版本或自定义程序包最有用.
此外, 在尝试构建自定义导出模板之前, 你仍然需要按照 为 Android 导出 教程中提到的步骤进行操作.
需求
要在Windows, Linux或macOS下进行编译, 需要以下内容:
SCons 4.0+ build system.
Android SDK (命令行工具就足够了).
所需的 SDK 组件将被自动安装。
在 Linux 上,请勿使用发行版仓库提供的 Android SDK,因为通常是过时的。
在 macOS 上,请勿使用 Homebrew 提供的 Android SDK,因为安装位置不统一。
Gradle(如果缺少,将自动下载并安装)。
JDK 17(OpenJDK 或 Oracle JDK)。
你可以从 Adoptium 下载一个版本。
设置构建系统
Set the environment variable
ANDROID_HOMEto point to the Android SDK. If you downloaded the Android command-line tools, this would be the folder where you extracted the contents of the ZIP archive.Windows: Press Windows + R, type "control system", then click on Advanced system settings in the left pane, then click on Environment variables on the window that appears.
Linux or macOS: Add the text
export ANDROID_HOME="/path/to/android-sdk"to your.bashrcor.zshrcwhere/path/to/android-sdkpoints to the root of the SDK directories.
在此文件夹中安装必要的SDK组件:
通过运行以下命令接受SDK组件许可证, 其中
android_sdk_path是android SDK的路径, 然后用y回答所有提示:
cmdline-tools/latest/bin/sdkmanager --sdk_root=<android_sdk_path> --licenses
运行以下命令完成安装, 其中
android_sdk_path是Android SDK的路径.
cmdline-tools/latest/bin/sdkmanager --sdk_root=<android_sdk_path> "platform-tools" "build-tools;34.0.0" "platforms;android-34" "cmdline-tools;latest" "cmake;3.10.2.4988404" "ndk;23.2.8568313"
After setting up the SDK and environment variables, be sure to restart your terminal to apply the changes. If you are using an IDE with an integrated terminal, you need to restart the IDE.
Run
scons platform=android. If this fails, go back and check the steps. If you completed the setup correctly, the NDK will begin downloading. If you are trying to compile GDExtension, you need to first compile the engine to download the NDK, then you can compile GDExtension.
构建导出模板
Godot needs three export templates for Android: the optimized "release"
template (android_release.apk), the debug template (android_debug.apk),
and the Gradle build template (android_source.zip).
As Google requires all APKs to include ARMv8 (64-bit) libraries since August 2019,
the commands below build templates containing both ARMv7 and ARMv8 libraries.
编译标准导出模板的方法是在Godot根目录下调用SCons, 参数如下:
Release template (used when exporting with Debugging Enabled unchecked)
scons platform=android target=template_release arch=arm32
scons platform=android target=template_release arch=arm64 generate_apk=yes
Debug template (used when exporting with Debugging Enabled checked)
scons platform=android target=template_debug arch=arm32
scons platform=android target=template_debug arch=arm64 generate_apk=yes
(Optional) Dev template (used when troubleshooting)
scons platform=android target=template_debug arch=arm32 dev_build=yes
scons platform=android target=template_debug arch=arm64 dev_build=yes generate_apk=yes
The resulting templates will be located under the bin directory:
bin/android_release.apkfor the release templatebin/android_debug.apkfor the debug templatebin/android_dev.apkfor the dev templatebin/android_source.zipfor the Gradle build template
备注
If you are changing the list of architectures you're building, remember to add
generate_apk=yesto the last architecture you're building, so that the template files are generated after the build.To include debug symbols in the generated templates, add the
debug_symbols=yesparameter to the SCons command.
参见
If you want to enable Vulkan validation layers, see Vulkan validation layers on Android.
添加对 x86 设备的支持
If you also want to include support for x86 and x86_64 devices, run the SCons
command a third and fourth time with the arch=x86_32, and
arch=x86_64 arguments before building the APK with Gradle. For
example, for the release template:
scons platform=android target=template_release arch=arm32
scons platform=android target=template_release arch=arm64
scons platform=android target=template_release arch=x86_32
scons platform=android target=template_release arch=x86_64 generate_apk=yes
This will create template binaries that works on all platforms. The final binary size of exported projects will depend on the platforms you choose to support when exporting; in other words, unused platforms will be removed from the binary.
清理生成的导出模板
你可以使用以下命令删除生成的导出模板:
cd platform/android/java
# On Windows
.\gradlew clean
# On Linux and macOS
./gradlew clean
使用导出模板
Godot needs release and debug binaries that were compiled against the same version/commit as the editor. If you are using official binaries for the editor, make sure to install the matching export templates, or build your own from the same version.
When exporting your game, Godot uses the templates as a base, and updates their content as needed.
安装模板
The newly-compiled templates (android_debug.apk
, android_release.apk, and android_source.zip) must be copied to Godot's templates folder
with their respective names. The templates folder can be located in:
Windows:
%APPDATA%\Godot\export_templates\<version>\Linux:
$HOME/.local/share/godot/export_templates/<version>/macOS:
$HOME/Library/Application Support/Godot/export_templates/<version>/
<version> is of the form major.minor[.patch].status using values from
version.py in your Godot source repository (e.g. 4.1.3.stable or 4.2.dev).
You also need to write this same version string to a version.txt file located
next to your export templates.
However, if you are writing your custom modules or custom C++ code, you might instead want to configure your template binaries as custom export templates here:
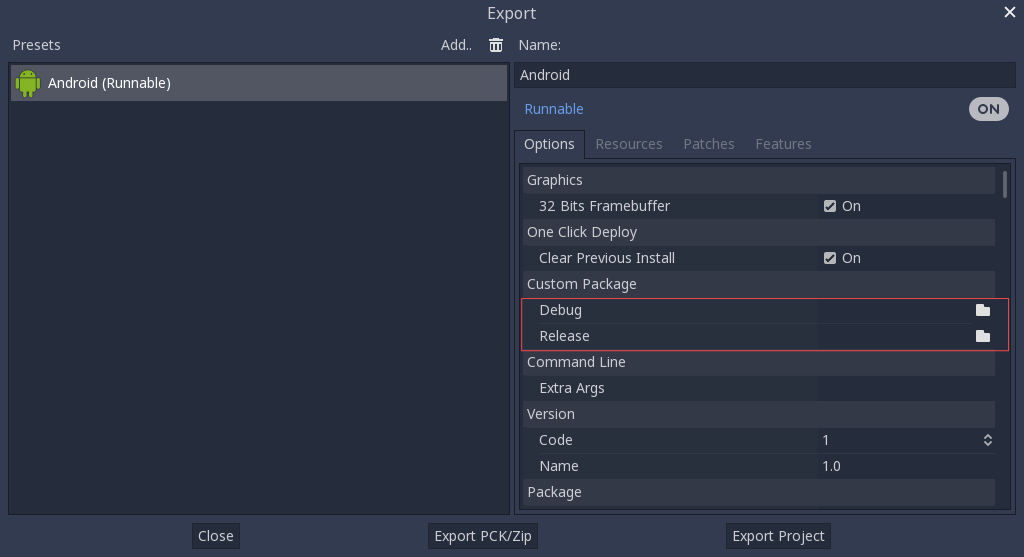
你甚至不需要复制它们, 只需引用在Godot源文件夹的 bin\ 目录中生成的文件, 因此下次构建时, 将自动引用自定义模板.
构建 Godot 编辑器
Compiling the editor is done by calling SCons from the Godot root directory with the following arguments:
scons platform=android arch=arm32 production=yes target=editor
scons platform=android arch=arm64 production=yes target=editor
scons platform=android arch=x86_32 production=yes target=editor
scons platform=android arch=x86_64 production=yes target=editor generate_apk=yes
You can add the
dev_build=yesparameter to generate a dev build of the Godot editor.You can add the
debug_symbols=yesparameter to include the debug symbols in the generated build.You can skip certain architectures depending on your target device to speed up compilation.
Remember to add generate_apk=yes to the last architecture you're building, so that binaries are generated after the build.
The resulting binaries will be located under bin/android_editor_builds/.
Removing the Editor binaries
You can use the following commands to remove the generated editor binaries:
 cd platform/android/java
 # On Windows
.\gradlew clean
# On Linux and macOS
./gradlew clean
Installing the Godot editor APK
在启用了开发者选项的 Android 设备上,通过 USB/USB-C 端口的充电线将 Android 设备连接到你的计算机。打开终端/命令提示符并在根目录使用以下参数运行命令:
adb install ./bin/android_editor_builds/android_editor-release.apk
故障排除
平台未在 SCons 中出现
Double-check that you've set the ANDROID_HOME
environment variable. This is required for the platform to appear in SCons'
list of detected platforms.
See Setting up the buildsystem
for more information.
应用程序未安装
Android可能会抱怨该应用程序未正确安装. 如果是这样的话:
检查是否正确生成了调试密钥库。
检查jarsigner可执行文件是否来自JDK 8.
如果仍然失败, 请打开命令行并运行 logcat:
adb logcat
然后在安装应用程序时检查输出;错误消息应该在此处显示. 如果无法解决, 请寻求帮助.
应用程序秒退
如果应用程序运行但秒退, 则可能是以下原因之一:
确保使用与你的编辑器版本匹配的导出模板;如果你使用的是新版Godot, 则还 必须 更新模板.
libgodot_android.sois not inlibs/<arch>/where<arch>is the device's architecture.设备的体系结构与导出的体系结构不匹配. 确保你的模板是针对该设备的体系结构构建的, 并且导出设置包括对该体系结构的支持.
无论如何, adb logcat 也应显示错误原因.