创建文档中的图像和视频
Throughout the documentation, images are often needed to make the explanation of a feature or concept as clear as possible for a reader. This page will explain the process from beginning to end.
图像
截图
可以使用屏幕截图工具截取 Godot 中的内容。
在 Windows 10 和 11 上,这将是 Snip & Sketch 程序。按 Windows + Shift + S 可以截取屏幕一部分的屏幕截图并将其保存到剪贴板。按下这些键后,点击并拖动你想要截取的区域。
On macOS, pressing Shift + Command + 3 does the same. To take a picture of the entire screen press Shift + Command + 4. All screenshots taken will be saved to the desktop.
每种Linux桌面环境都有自己的屏幕截图工具。比如,在KDE Plasma(译者注:一种linux桌面环境)中,Spectacle 程序用于拍摄截图。如果你的发行版默认没有截图工具,尝试搜索包仓库。如果支持也可以搜索Flathub(译者注:一种Linux应用商店)。
所有的屏幕截图最好在1080p分辨率屏幕上截取。使用更高分辨率会增加无谓细节,这不但不能使文件更好,而且会显著增加文件大小。如果你在更高分辨率的屏幕上截图,截图应该缩小。在本页的后面,会有关于如何执行此操作的说明。
格式转换
The current format for images in Godot's documentation is WebP (.webp).
While some Linux programs will support saving screenshots in this format, macOS
and the Snip & Sketch program on Windows do not. For images that don't need
editing, such as precise cropping or adding outlines, Squoosh can be used.
Squoosh is a converter developed by Google, is open
source, and doesn't give Google any image rights by using it. When choosing
compression if you can get an image that's under 300KB in size use lossless
compression. If it's over 300KB, use just enough lossy compression to get it
under that size. If this results in noticeable compression artifacts using less
compression is fine, even if the file size is bigger.
如果你已经安装了图像编辑器,比如GIMP,Krita或者Photoshop,这些软件可以打开图像,然后将其保存为一个WebP(译者注:一种图像文件格式)文件。
备注
Since WebP supports animations and the documentation can display videos, GIFs should be avoided. Their compression is inefficient and they only support a 256-color palette with 1-bit transparency.
裁剪
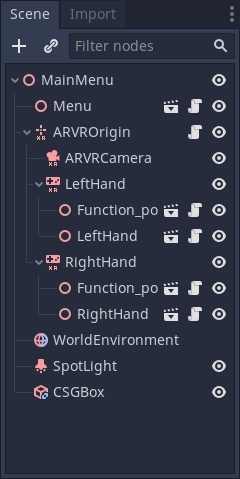
For a screenshot of a 2D or 3D scene in the editor, the above steps will be enough. But for most UI images some extra work should be done, specifically cropping to make an image look clean. Below is an example of good cropping.
For cropping Krita is the recommended program. While some screenshot programs do have cropping built-in it's not always easy to get something precise. And while Krita is designed as a painting program the cropping tool gives you pixel precision by default. Of course, feel free to use a different program you are familiar with.
If you've never used Krita before download it from the official Krita website, on Linux you may also be able to download it from your distributions repository, flathub is also an option. Once it's installed on your computer open Krita then open the image you want to crop. This button on the left panel is the crop tool.

选择它后,单击图像,现在应该可以使用裁剪工具。
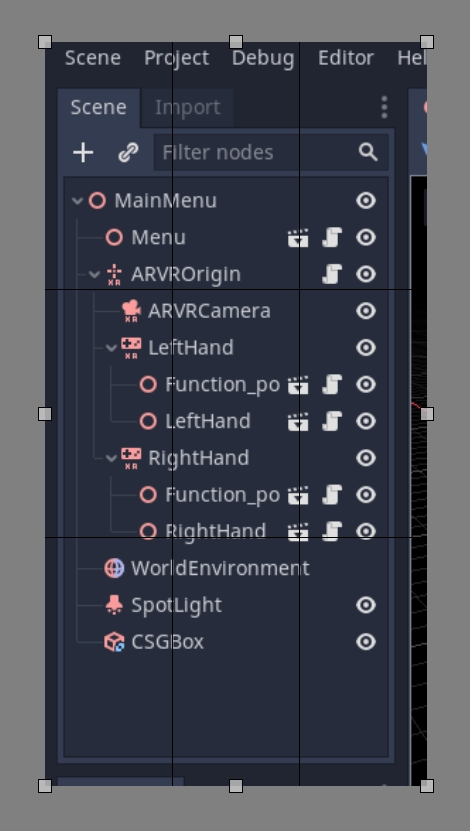
点击并拖动白色框以调整裁剪的内容,如果放大图像,你将看到图像中的各个像素,这对精度很有用。
如果你编辑失误并且进行了过度裁剪,请不要担心,Krita 中的裁剪是非破坏性的,并且可以进行调整。在仍选择裁剪工具的情况下单击图像,控件将返回。
缩小图像
正如本页前面所解释的,在分辨率高于 1080p 的屏幕上拍摄的所有图像都应按比例缩小。要在 Krita 中执行此操作,请单击顶部栏上的 图像 ,然后从下拉菜单中选择 将图像缩放到新尺寸 。也可以通过按 Ctrl + Alt + I 打开此菜单。在此菜单上调整像素尺寸。对于在 4K 显示器上拍摄的任何内容,请将宽度和高度的值更改为其当前值的一半;对于在 1440p 显示器上拍摄的任何内容,请将宽度和高度乘以 0.75。确保选中菜单底部的 约束比例 框,这样只需更改 1 个值。
在 Krita 中保存为 WebP
To save an image as webp if it isn't already one, Go to File > Save As. Select webp from the Save as type: dropdown, then choose wherever you want to save it. After clicking Save a menu will popup with webp options. Make sure Lossless is checked and Quality is set to 100%. This means the image will not lose detail and will be as small as possible.
If the image is over 300KB in size try compressing it losslessly using Squoosh. If it's still over 300KB change to lossy compression and slowly increase the compression until it's under 300KB. If this results in noticeable compression artifacts using less compression is fine, even if the file size is bigger.
Outlines, arrows and text
有时,一张图片需要一些额外的东西来适当的引导读者的注意力,或者让一些东西变得清晰。轮廓线和箭头可以用于此目的。对于这些类型的编辑,Inkscape 是推荐的开源程序,可以从`Inkscap 官方网站<https://inkscape.org/>`_ 下载 。像 Krita 一样,如果你在 Linux 上,你也可以检查你的发行版仓库或从 Flatchub 获取。
这里没有提供关于创建轮廓的完整教程,我们建议搜索各种关于如何在线使用它的教程。但是,文档图像轮廓和箭头有两个标准。首先,颜色应该是黄色,特别是这种十六进制颜色: fffb44 (如果有像 Inkscape 中那样的透明度值,则为 fffb44ff )。选择这种颜色是为了确保色盲在阅读文档时不会遇到问题,如果需要在图像上使用多个轮廓,则除了这种黄色之外,还可以使用其他颜色,应避免使用红色。第二个标准是所有的轮廓和箭头线都应该是 2 像素宽。
最后,一些图像可能需要文本来区分图像的多个部分。除了使用易读的非花哨字体外,没有其他严格的要求。至于颜色,也应该使用以前的黄色,但如果合适,可以使用黑色或其他颜色。例如,如果黄色混合到图像中,或者如果存在多种颜色的多个轮廓。
将图像添加到文档页面
完成图像处理后,就可以将它添加到文档中了。所有的图像都保存在使用它们的页面旁边的名为 img 的文件夹中。
要添加图像,请将其添加到 img 文件夹中,该文件夹与页面的 .rst 文件位于同一文件夹中(如果不存在,请创建它)。在 .rst 页面中,图像应包含在以下代码段中:
.. image:: img/documentation_image.webp
其中 documentation_image.webp 将更改为所创建图像的名称。以明确的方式为图像命名,可以的话使用前缀明确表示它们与文档页面的关系。
视频
采集视频
如果要在 Godot 中录制视频,可以使用一个屏幕录制工具。大部分操作系统不提供足够灵活以胜任此任务的工具,所以你需要安装一个第三方实用应用。
OBS Studio 是最为流行的选项,但可以使用 SimpleScreenRecorder 作为 Linux 上的一种替代方案。可以使用 ShareX 作为 Windows 上的一种替代方案。所有这些工具都可以设定为录制整个屏幕,某个特定的窗口,或者指定的矩形区域。
录制视频建议采用的帧率是 60 FPS,但较长的视频可以采用 30 FPS 以减小文件大小。全屏视频应采用 1280x720 的分辨率。
备注
Godot 的 Movie Maker mode 可以用来录制运行中项目的输出,包括其中的音频。这样无需安装任何第三方软件,并且可以完全避免丢帧(即使是在较慢的设备上录制),但灵活性相对较低。
压缩采集到的视频
建议录制视频时(在保证不会因过度负载 CPU/GPU 导致丢帧的前提下)采用尽可能高的质量设定,之后再通过重新编码视频来缩小文件大小。这种压缩方式相对于直接减小文件大小更有效,因为实时压缩方法效率低于相对更慢的压缩方法。
要通过重新编码减小文件大小,可以采用如下的 HandBrake 或 FFmpeg <https://ffmpeg.org/> 命令行:
ffmpeg -i input.mp4 -crf 23 output.webm
-crf 之后的数值用于调整视频质量,更高的数值会生成 更低 的视频质量(和更小的文件大小)。给 CRF 取值 23 是个不错的出发点,但对于更长的视频,可能需要采用更大的值将文件大小控制在合理范围内。目标文件大小尽量控制在 2 MB 以内。
如果视频采用较高的分辨率或帧率录制,可以采用以下的方法来调整分辨率和帧率:
ffmpeg -i input.mp4 -crf 23 -vf scale=1280:-2 -r 30 output.webm
这样最终的视频分辨率为 1280x720 左右,帧率为 30FPS。视频分辨率的具体值取决于来源的纵横比。
小技巧
如果视频录制时带有音轨,而后又不需要这条音轨,可以考虑在 FFmpeg 命令行中(输出文件名之前)加上 -an 选项以将其除去。这样可以缩小文件大小,同时保证视频在浏览器中播放时不会出现音频控制设置。
将视频添加到文档页面
完成视频处理后,就可以将它添加到文档中了。所有的视频都保存在使用它们的页面旁边的名为 video 的文件夹中。
要添加视频,请将其添加到 video 文件夹中,该文件夹与页面的 .rst 文件位于同一文件夹中(如果不存在,请创建它)。在 .rst 页面中,视频应包含在以下代码段中:
.. video:: video/csg_tools.webm
   :alt: Put a text description of the video here
   :autoplay:
   :loop:
   :muted:
   :align: default
其中 documentation_video.webp 将更改为所创建视频的名称。以明确的方式为视频命名,可以的话使用前缀明确表示它们与文档页面的关系。
The :autoplay:, :loop: and :muted: flags should always be specified
unless the video needs to play audio. In this case, do not specify any of these flags.
The :align: default flag should always be specified.