创建敌人
是时候去做一些玩家必须躲避的敌人了。 它们的行为很简单: 怪物将随机生成在屏幕的边缘,沿着随机的方向直线移动。
我们将创建一个 Mob 的怪物场景,以便在游戏中独立实例化出任意数量的怪物。
节点设置
点击顶部菜单的“场景 -> 新建场景”,然后添加以下节点:
RigidBody2D(名为
Mob)
别忘了设置子项,使其无法被选中,就像你对 Player 场景所做的那样。
选择 Mob 节点,并在检查器的 RigidBody2D 部分中把它的 Gravity Scale 属性设置为 0。这样可以防止怪物向下坠落。
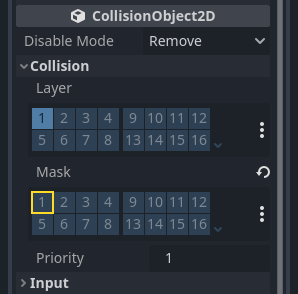
此外,在 RigidBody2D 部分下方的 CollisionObject2D 部分下,展开 Collision 分组并取消选中 Mask 属性里的 1。这将确保怪物们不会相互碰撞。
像设置玩家一样设置 AnimatedSprite2D。这一次,我们有 3 个动画:fly、swim、walk,每个动画在 art 文件夹中都有两张图片。
必须为每个单独动画设置 动画速度 属性,将三个动画的对应动画速度值都调整为 3。
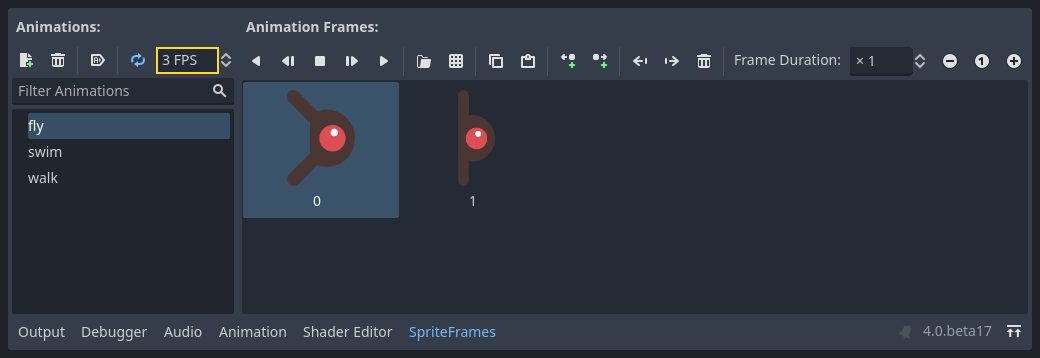
你可以使用 动画速度 输入区域右侧的“播放动画”按钮预览动画。
我们将随机选择其中一个动画,以便小怪有一些变化。
像玩家的图像一样,这些小怪的图像也要缩小。请将 AnimatedSprite2D 的 Scale 属性设为 (0.75, 0.75)。
像在 Player 场景中一样,为碰撞添加一个 CapsuleShape2D。为了使形状与图像对齐,你需要将 Rotation 属性设为 90(在“检查器”的“Transform”下)。
保存该场景。
敌人的脚本
像这样将脚本添加到 Mob 上:
extends RigidBody2D
using Godot;

public partial class Mob : RigidBody2D
{
    // Don't forget to rebuild the project.
}
现在让我们看一下脚本的其余部分。在 _ready() 中,我们从三个动画类型中随机选择一个播放:
func _ready():
    var mob_types = Array($AnimatedSprite2D.sprite_frames.get_animation_names())
    $AnimatedSprite2D.animation = mob_types.pick_random()
public override void _Ready()
{
    var animatedSprite2D = GetNode<AnimatedSprite2D>("AnimatedSprite2D");
    string[] mobTypes = animatedSprite2D.SpriteFrames.GetAnimationNames();
    animatedSprite2D.Play(mobTypes[GD.Randi() % mobTypes.Length]);
}
首先,我们从 AnimatedSprite2D 的 sprite_frames 属性中获取动画名称的列表。返回的是一个数组,该数组包含三个动画名称:["walk", "swim", "fly"]。
In the GDScript code, we use the Array.pick_random method
to select one of these animation names at random. Meanwhile, in the C# code, we pick a random number
between 0 and 2 to select one of these names from the list (array indices start at 0). The
expression GD.Randi() % n selects a random integer between 0 and n-1.
最后一步是让怪物在超出屏幕时删除自己。将 VisibleOnScreenNotifier2D 节点的 screen_exited() 信号连接到 Mob 上,然后添加如下代码:
func _on_visible_on_screen_notifier_2d_screen_exited():
    queue_free()
// We also specified this function name in PascalCase in the editor's connection window.
private void OnVisibleOnScreenNotifier2DScreenExited()
{
    QueueFree();
}
queue_free() is a function that essentially 'frees', or deletes, the node at the end of the frame.
这样就完成了 Mob 场景。
玩家和敌人已经准备就绪,接下来,我们将在一个新的场景中把他们放到一起。我们将使敌人在游戏板上随机生成并前进,我们的项目将变成一个能玩的游戏。