Work in progress
The content of this page was not yet updated for Godot
4.4
and may be outdated. If you know how to improve this page or you can confirm
that it's up to date, feel free to open a pull request.
2D 粒子系统
简介
粒子系统用于模拟复杂的物理效果,例如火花、火焰、魔法粒子、烟雾、薄雾等。
这个想法是以固定的间隔发射具有固定的寿命的 "粒子"。 在其生命周期中,每个粒子都具有相同的基本行为。 让每个粒子变得不同并提供整体更加 "有机" 外观的是与各个参数相关的 "随机性"。 实质上,创建粒子系统意味着设置基本物理参数,然后为它们添加随机性。
粒子节点
Godot 为 2D 粒子提供了两个不同的节点: GPUParticles2D 和 CPUParticles2D。 GPUParticles2D 更先进,使用 GPU 来处理粒子效果。 CPUParticles2D 是 CPU 驱动的选项,其功能与 GPUParticles2D 几乎相同,但在使用大量粒子时性能较低。 另一方面,CPUParticles2D 在低端系统或 GPU 瓶颈情况下可能表现更好。
虽然 GPUParticles2D 是通过 ParticleProcessMaterial(还可以使用自定义着色器)进行配置的,不过匹配的选项是通过 CPUParticles2D 中的节点属性提供的(除了轨迹设置)。
Going forward there are no plans to add new features to CPUParticles2D, though pull requests to add features already in GPUParticles2D will be accepted. For that reason we recommend using GPUParticles2D unless you have an explicit reason not to.
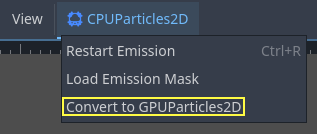
You can convert a CPUParticles2D node into a GPUParticles2D node by clicking on the node in the scene tree, selecting the 2D workspace, and selecting CPUParticles2D > Convert to GPUParticles2D in the toolbar.
It is also possible to convert a GPUParticles2D node to a CPUParticles2D node, however there may be issues if you use GPU-only features.
本教程的其余部分将使用 GPUParticles2D 节点。 首先,将 GPUParticles2D 节点添加到场景中。 创建该节点后,你会注意到仅创建了一个白点,并且场景停靠栏中的 GPUParticles2D 节点旁边有一个警告图标。 这是因为节点需要 ParticleProcessMaterial 才能发挥作用。
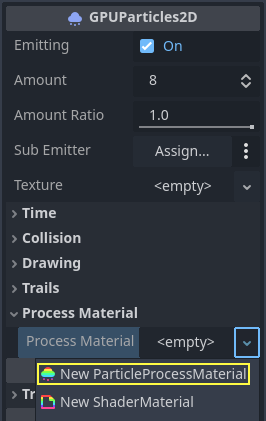
ParticleProcessMaterial
要将处理材质添加到粒子节点,请转到检查器面板中的 Process Material。单击 Material 旁边的框,然后从下拉菜单中选择 新建 ParticleProcessMaterial。
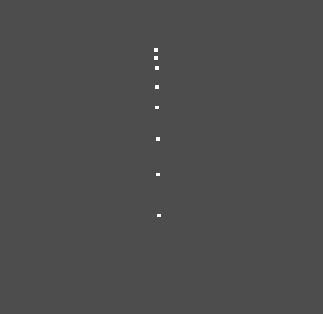
你的 GPUParticles2D 节点现在应该可以向下发射白点了。
纹理(Texture)
粒子系统可以使用单个纹理或动画 翻页 (filpbook)。翻页是一种纹理,其中包含可以回放或在发射期间随机选择的多个动画帧。翻页相当于粒子的精灵表。
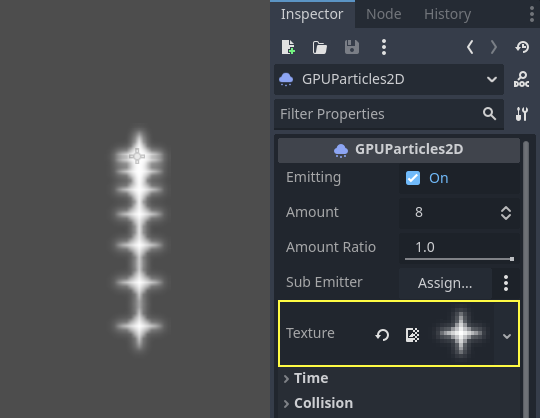
纹理通过 Texture 属性设置:
使用动画翻页
粒子翻页适合再现复杂的效果,如烟雾、火焰、爆炸。它们还可以通过使每个粒子使用不同的纹理,来引入随机纹理变化。你可以在线寻找现成的粒子翻页图,或使用外部工具预渲染它们,例如 Blender 或 EmberGen 。
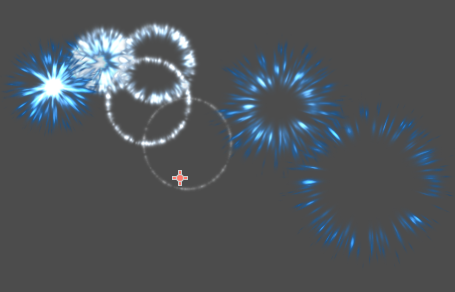
使用翻页纹理的粒子系统示例
相比起单个纹理,使用动画翻页需要额外的配置。出于演示目的,我们将使用这 5 列 7 行的纹理(右键单击并选择 另存为... ):
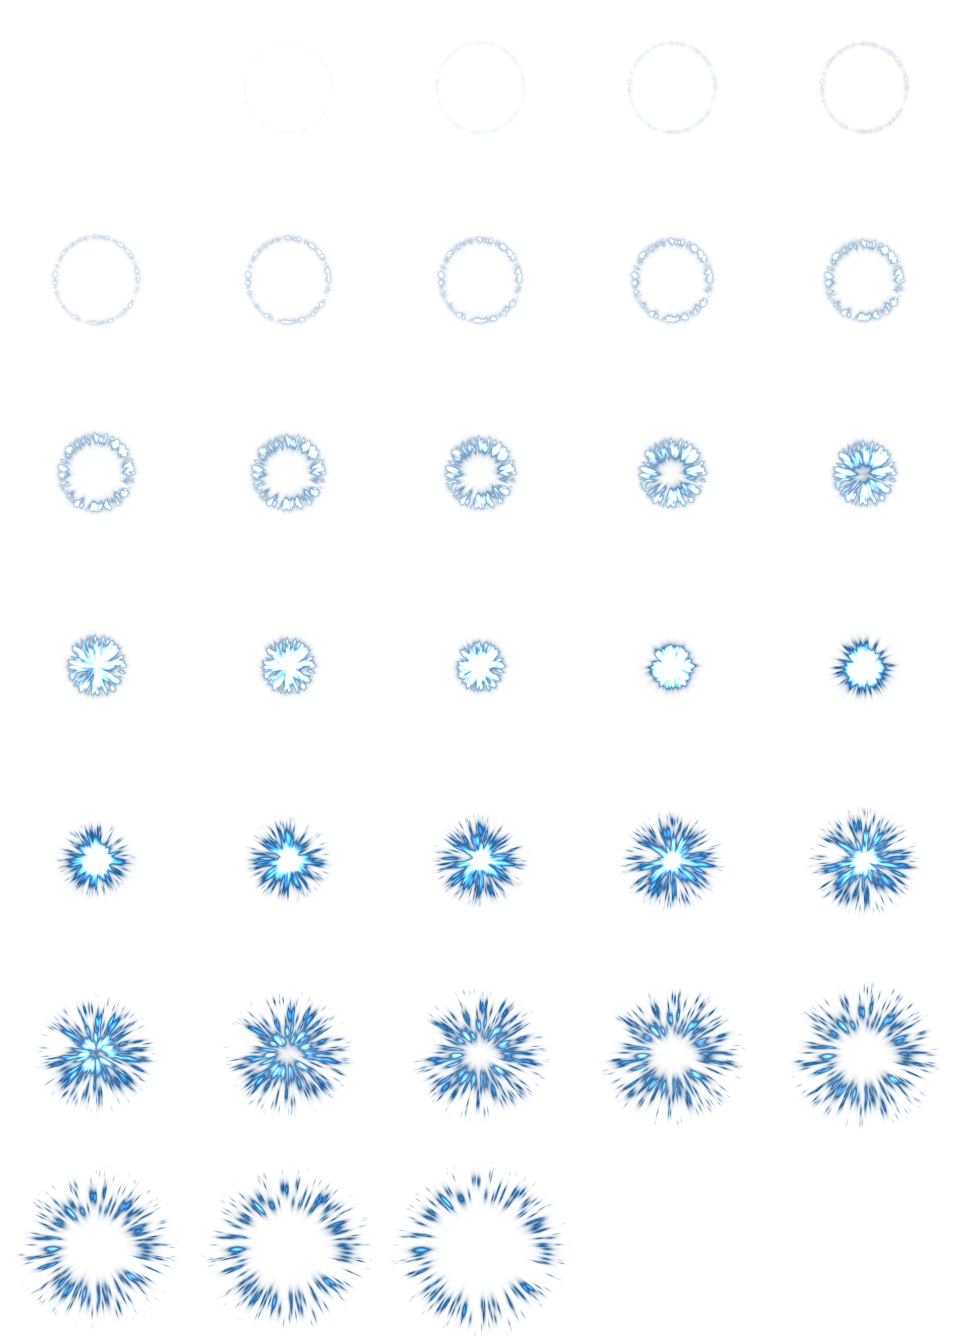
作者:JoesAlotofthings (CC BY 4.0)
要使用动画翻页,你必须在 GPUParticles2D(或 CPUParticles2D)节点的 Material 部分中创建一个新的 CanvasItemMaterial:
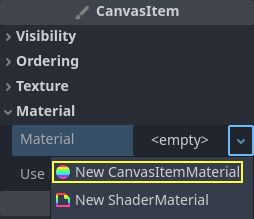
在粒子节点检查器的底部创建一个 CanvasItemMaterial
在这个 CanvasItemMaterial 中,启用 Particle Animation ,并将 H Frames 和 V Frames 分别设置为翻页纹理中的列数和行数:
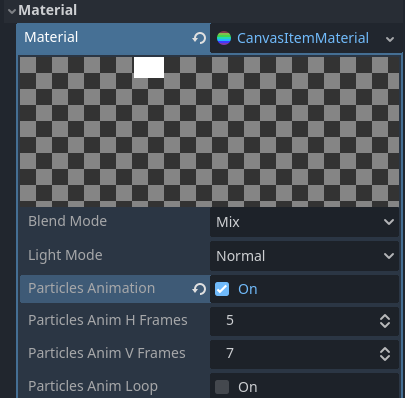
为示例翻页纹理配置 CanvasItemMaterial
完成此操作后,ParticleProcessMaterial(对于 GPUParticles2D)或 CPUParticles2D 检查器中的 动画部分 将生效。
小技巧
如果你的翻页纹理是黑色背景而不是透明背景,你还需要将混合模式设置为 Add 而不是 Mix 才能使它正确地显示。或者,你也可以修改纹理以使它在图像编辑器中有透明背景。在 GIMP 中,可以使用 Color > Color to Alpha 菜单来完成此操作。
时间参数
生命期(Lifetime)
每个粒子存活的时间,单位为秒。当生命期结束时,将创建一个新粒子来替换它。
寿命:0.5
寿命:4.0
单次(One Shot)
启用后,GPUParticles2D 节点将一次发射其所有粒子,之后将不再发射。
预处理(Preprocess)
粒子系统从没有粒子被发射开始,然后开始发射。 当加载场景如火炬,雾等系统时可能会带来不便,因为它会在进入场景的那一刻开始发射。 预处理用于让系统在第一次实际绘制之前处理给定的秒数。
速度缩放(Speed Scale)
速度比例具有默认值 1 ,用于调整粒子系统的速度。 降低值会使粒子变慢,而增加值会使粒子更快。
爆炸性(Explosiveness)
如果有10个寿命为 1 的粒子,则意味着粒子将每0.1秒发射一次. 爆炸性参数改变了这一点,并迫使粒子一起发射. 范围是:
0: 定期发射粒子(默认值)。
1: 同时发射所有粒子。
中间的值也是允许的。 此功能对于创建爆炸或突然爆发的粒子非常有用:
随机性(Randomness)
所有物理参数都可以随机化。 随机值范围从 0 到 1。 随机化参数的公式为:
initial_value = param_value + param_value * randomness
固定 FPS(Fixed FPS)
此设置可用于将粒子系统设置为以固定的帧率渲染。 例如,将值更改为 2 将使粒子以每秒2帧的速度渲染。 请注意,这不会减慢粒子系统本身的速度。
备注
Godot 4.3 does not currently support physics interpolation for 2D particles. As a workaround, disable physics interpolation for the particles node by setting Node > Physics Interpolation > Mode at the bottom of the inspector.
Fract Delta
Setting Fract Delta to true results in fractional delta calculation,
which has a smoother particles display effect.
This increased smoothness stems from higher accuracy.
The difference is more noticeable in systems with high randomness or fast-moving particles.
It helps maintain the visual consistency of the particle system,
making sure that each particle's motion aligns with its actual lifespan.
Without it, particles might appear to jump or move more than they should in a single frame
if they are emitted at a point within the frame.
The greater accuracy has a performance tradeoff,
particularly in systems with a higher amount of particles.
绘图参数
可见矩形(Visibility Rect)
可见性矩形控制粒子在屏幕上的可见性。 如果此矩形位于视口之外,则引擎将不会在屏幕上渲染粒子。
矩形的 W 和 H 属性分别控制其宽度和高度。X 和 Y 属性控制矩形左上角相对于粒子发射器的位置。
可以使用 2d 视图上方的工具栏让 Godot 自动生成可见性矩形。 为此,请选择 GPUParticles2D 节点并单击 粒子 > 生成可见性矩形。 Godot 将模拟 Particles2D 节点发射粒子几秒钟,并设置矩形以适合粒子所占据的表面。
你可以使用 Generation Time (sec) 选项控制发射持续时间。 最大值为25秒。 如果你需要更多时间让粒子移动,你可以暂时更改Particles2D节点上的 preprocess 时间。
局部坐标(Local Coords)
默认情况下,此选项处于启用状态,这意味着粒子发射的空间是相对于节点来算的。 如果移动节点,则所有粒子会随之移动:

如果禁用,粒子将发射到全局空间,这意味着如果移动节点,则已发射的粒子不会受到影响:
绘制顺序(Draw Order)
这可以控制绘制单个粒子的顺序。Index 表示粒子根据它们的发射顺序被绘制(默认)。Lifetime 表示它们按照剩余寿命的顺序被绘制。
Particle Process Material Settings
For information on the settings in the ParticleProcessMaterial see this page.