GDExtension C++ 示例
前言
GDExtension 的 C++ 绑定是在 C GDExtension API 基础之上构建的,为扩展 Godot 中的节点和其他内置类提供了一种更为简洁的方法。这一新系统使得通过 GDExtension 对 Godot 进行扩展的能力几乎可以与静态链接的 C++ 模块相媲美。
你可以在 GitHub 上的 godot-cpp 仓库的测试文件夹中下载包含的示例。
设置项目
这里有一些前置需求是你需要的:
一份 Godot 4 可执行文件,
一个 C++ 编译器,
作为构建工具的 SCons ,
godot-cpp 仓库的副本。
See also Configuring an IDE and Compiling as the build tools are identical to the ones you need to compile Godot from source.
你可以从 GitHub 下载 godot-cpp 仓库,或者让 Git 为你完成这项工作。请注意,这个仓库为不同版本的 Godot 提供了不同的分支。GDExtensions 仅支持 Godot 的新版本(Godot 4 及更高版本),反之亦然,因此请确保你下载的是正确的分支。
备注
To use GDExtension
you need to use the godot-cpp branch that matches the version of Godot that you are
targeting. For example, if you're targeting Godot 4.1, use the 4.1 branch. Throughout
this tutorial we use 4.x, which will need to be replaced with the version of Godot you
are targeting.
master 分支是开发分支,它会定期更新以与 Godot 的 master 分支保持兼容。
警告
Our long-term goal is that GDExtensions targeting an earlier version of Godot will work in later minor versions, but not vice-versa. For example, a GDExtension targeting Godot 4.1 should work just fine in Godot 4.2, but one targeting Godot 4.2 won't work in Godot 4.1.
不过,GDExtension 目前仍是 实验性的,这就意味着我们为了修复严重的 bug 或引入重大的特性,可能会牺牲兼容性。例如,为 Godot 4.0 创建的 GDExtension 与 Godot 4.1 并不兼容(参见《将 GDExtension 更新到 4.1》)。
如果你使用 Git 对项目进行版本控制,最好将项目添加为 Git 子模块:
mkdir gdextension_cpp_example
cd gdextension_cpp_example
git init
git submodule add -b 4.x https://github.com/godotengine/godot-cpp
cd godot-cpp
git submodule update --init
也可以直接将该项目克隆到项目文件夹内:
mkdir gdextension_cpp_example
cd gdextension_cpp_example
git clone -b 4.x https://github.com/godotengine/godot-cpp
备注
如果你决定下载仓库或将其克隆到你的文件夹中,请确保与我们这里所设置的文件夹结构相同,我们假定将在此展示的许多代码都基于这种项目结构。
如果从介绍中指定的链接克隆示例, 子模块不会自动初始化. 你需要执行以下命令:
cd gdextension_cpp_example
git submodule update --init
这会将该仓库克隆到你的项目文件夹中。
构建 C++ 绑定
现在我们已经下载了我们的前置需求, 现在是构建C++绑定的时候了.
The repository contains a copy of the metadata for the current Godot release, but if you need to build these bindings for a newer version of Godot, call the Godot executable:
godot --dump-extension-api
生成的 extension_api.json 文件将会出现在可执行文件的目录中,将其复制到项目文件夹中,并在下面的 scons 命令中添加 custom_api_file=<PATH_TO_FILE> 参数。
用该命令来生成、编译绑定(取决于你的操作系统,用 windows , linux 或 macos 代替 <platform> ):
构建过程会自动检测可用于并行构建的 CPU 线程数量。要指定使用的 CPU 线程数,请在 SCons 命令行的末尾添加 -jN,其中 N 是你希望使用的 CPU 线程数量。
cd godot-cpp
scons platform=<platform> custom_api_file=<PATH_TO_FILE>
cd ..
这一步将需要一段时间。完成后,你应该有一个静态库,可以编译到你的项目中,存储在 godot-cpp / bin / 内。
备注
你可能需要在 Windows 或 Linux 的命令行中添加 bits=64。
创建一个简单的插件
现在是构建实际插件的时候了。我们首先创建一个空的 Godot 项目,我们将在其中放置一些文件。
打开 Godot 并创建一个新项目。对于该示例,我们将其放在我们的 GDExtension 的文件夹结构中名为 demo 的文件夹中。
在我们的演示项目中,我们将创建一个包含名为 "Main" 的节点的场景,我们将其保存为 main.tscn ,稍后再回过头来看看。
回到顶层 GDExtension 模块文件夹,我们还要创建一个名为 src 的子文件夹,将在其中放置源文件。
在你的 GDExtension 模块中,你现在应该有 demo 、 godot-cpp 和 src 这三个目录。
你的文件结构应如下所示:
gdextension_cpp_example/
|
+--demo/                  # game example/demo to test the extension
|
+--godot-cpp/             # C++ bindings
|
+--src/                   # source code of the extension we are building
在 src 文件夹中,我们将首先为我们将要创建的 GDExtension 节点创建头文件,将其命名为 gdexample.h :
#ifndef GDEXAMPLE_H
#define GDEXAMPLE_H

#include <godot_cpp/classes/sprite2d.hpp>

namespace godot {

class GDExample : public Sprite2D {
    GDCLASS(GDExample, Sprite2D)

private:
    double time_passed;

protected:
    static void _bind_methods();

public:
    GDExample();
    ~GDExample();

    void _process(double delta) override;
};

}

#endif
There are a few things of note to the above. We include sprite2d.hpp which
contains bindings to the Sprite2D class. We'll be extending this class in our
module.
We're using the namespace godot, since everything in GDExtension is defined
within this namespace.
Then we have our class definition, which inherits from our Sprite2D through a
container class. We'll see a few side effects of this later on. The
GDCLASS macro sets up a few internal things for us.
之后, 我们声明一个名为 time_passed 的成员变量.
In the next block we're defining our methods, we have our constructor and destructor defined, but there are two other functions that will likely look familiar to some, and one new method.
The first is _bind_methods, which is a static function that Godot will
call to find out which methods can be called and which properties it exposes.
The second is our _process function, which will work exactly the same
as the _process function you're used to in GDScript.
所以, 让我们通过创建 gdexample.cpp 文件来实现我们的函数:
#include "gdexample.h"
#include <godot_cpp/core/class_db.hpp>

using namespace godot;

void GDExample::_bind_methods() {
}

GDExample::GDExample() {
    // Initialize any variables here.
    time_passed = 0.0;
}

GDExample::~GDExample() {
    // Add your cleanup here.
}

void GDExample::_process(double delta) {
    time_passed += delta;

    Vector2 new_position = Vector2(10.0 + (10.0 * sin(time_passed * 2.0)), 10.0 + (10.0 * cos(time_passed * 1.5)));

    set_position(new_position);
}
这一步应该非常直截了当。我们要实现头文件中定义的类中的每个方法。
注意 _process 函数,它用于记录经过的时间,并利用正弦和余弦函数计算精灵的新位置。
There is one more C++ file we need; we'll name it register_types.cpp. Our
GDExtension plugin can contain multiple classes, each with their own header
and source file like we've implemented GDExample up above. What we need now
is a small bit of code that tells Godot about all the classes in our
GDExtension plugin.
#include "register_types.h"

#include "gdexample.h"

#include <gdextension_interface.h>
#include <godot_cpp/core/defs.hpp>
#include <godot_cpp/godot.hpp>

using namespace godot;

void initialize_example_module(ModuleInitializationLevel p_level) {
    if (p_level != MODULE_INITIALIZATION_LEVEL_SCENE) {
        return;
    }

    GDREGISTER_RUNTIME_CLASS(GDExample);
}

void uninitialize_example_module(ModuleInitializationLevel p_level) {
    if (p_level != MODULE_INITIALIZATION_LEVEL_SCENE) {
        return;
    }
}

extern "C" {
// Initialization.
GDExtensionBool GDE_EXPORT example_library_init(GDExtensionInterfaceGetProcAddress p_get_proc_address, const GDExtensionClassLibraryPtr p_library, GDExtensionInitialization *r_initialization) {
    godot::GDExtensionBinding::InitObject init_obj(p_get_proc_address, p_library, r_initialization);

    init_obj.register_initializer(initialize_example_module);
    init_obj.register_terminator(uninitialize_example_module);
    init_obj.set_minimum_library_initialization_level(MODULE_INITIALIZATION_LEVEL_SCENE);

    return init_obj.init();
}
}
The initialize_example_module and uninitialize_example_module functions get
called respectively when Godot loads our plugin and when it unloads it. All
we're doing here is parse through the functions in our bindings module to
initialize them, but you might have to set up more things depending on your
needs. We call the GDREGISTER_RUNTIME_CLASS macro for each of our classes
in our library. This will make them run only in game, like the default for GDScript.
The important function is the third function called example_library_init.
We first call a function in our bindings library that creates an initialization object.
This object registers the initialization and termination functions of the GDExtension.
Furthermore, it sets the level of initialization (core, servers, scene, editor, level).
最后,我们需要为 register_types.cpp 创建一个头文件,命名为 register_types.h。
#ifndef GDEXAMPLE_REGISTER_TYPES_H
#define GDEXAMPLE_REGISTER_TYPES_H

#include <godot_cpp/core/class_db.hpp>

using namespace godot;

void initialize_example_module(ModuleInitializationLevel p_level);
void uninitialize_example_module(ModuleInitializationLevel p_level);

#endif // GDEXAMPLE_REGISTER_TYPES_H
编译插件
To compile the project we need to define how SCons using should compile it
using a SConstruct file which references the one in godot-cpp.
Writing it from scratch is outside the scope of this tutorial, but you can
the SConstruct file we prepared.
We'll cover a more customizable, detailed example on how to use these
build files in a subsequent tutorial.
备注
这个 SConstruct 文件是针对最新的 godot-cpp 主分支编写的,用于更早版本的话可能需要略微进行一些修改,也可以参考 Godot 4.x 文档中的 SConstruct 文件。
下载 SConstruct 文件后,请将其放在你的 GDExtension 文件夹中和 godot-cpp、godot-headers 和 demo 平级的位置,然后运行:
scons platform=<platform>
你现在应该能够在 demo/bin/<platform> 中找到该模块。
When building for iOS, package the module as a static .xcframework, you can use following commands to do so:
# compile simulator and device modules
scons arch=universal ios_simulator=yes platform=ios target=<target>
scons arch=arm64 ios_simulator=no platform=ios target=<target>

# assemble xcframeworks
xcodebuild -create-xcframework -library demo/bin/libgdexample.ios.<target>.a -library demo/bin/libgdexample.ios.<target>.simulator.a -output demo/bin/libgdexample.ios.<target>.xcframework
xcodebuild -create-xcframework -library godot-cpp/bin/libgodot-cpp.ios.<target>.arm64.a -library godot-cpp/bin/libgodot-cpp.ios.<target>.universal.simulator.a  -output demo/bin/libgodot-cpp.ios.<target>.xcframework
备注
我们这里是将 godot-cpp 和 gdexample 库都编译为了调试构建。需要优化构建的话,编译时请使用 target=template_release 开关。
使用 GDExtension 模块
回到 Godot 之前我们还需要在 demo/bin/ 中再创建一个文件。
这个文件的作用是让 Godot 知道每个平台对应需要加载哪个动态库,以及模块的入口函数。这个文件的文件名为 gdexample.gdextension。
[configuration]

entry_symbol = "example_library_init"
compatibility_minimum = "4.1"
reloadable = true

[libraries]

macos.debug = "res://bin/libgdexample.macos.template_debug.framework"
macos.release = "res://bin/libgdexample.macos.template_release.framework"
ios.debug = "res://bin/libgdexample.ios.template_debug.xcframework"
ios.release = "res://bin/libgdexample.ios.template_release.xcframework"
windows.debug.x86_32 = "res://bin/libgdexample.windows.template_debug.x86_32.dll"
windows.release.x86_32 = "res://bin/libgdexample.windows.template_release.x86_32.dll"
windows.debug.x86_64 = "res://bin/libgdexample.windows.template_debug.x86_64.dll"
windows.release.x86_64 = "res://bin/libgdexample.windows.template_release.x86_64.dll"
linux.debug.x86_64 = "res://bin/libgdexample.linux.template_debug.x86_64.so"
linux.release.x86_64 = "res://bin/libgdexample.linux.template_release.x86_64.so"
linux.debug.arm64 = "res://bin/libgdexample.linux.template_debug.arm64.so"
linux.release.arm64 = "res://bin/libgdexample.linux.template_release.arm64.so"
linux.debug.rv64 = "res://bin/libgdexample.linux.template_debug.rv64.so"
linux.release.rv64 = "res://bin/libgdexample.linux.template_release.rv64.so"
android.debug.x86_64 = "res://bin/libgdexample.android.template_debug.x86_64.so"
android.release.x86_64 = "res://bin/libgdexample.android.template_release.x86_64.so"
android.debug.arm64 = "res://bin/libgdexample.android.template_debug.arm64.so"
android.release.arm64 = "res://bin/libgdexample.android.template_release.arm64.so"

[dependencies]
ios.debug = {
    "res://bin/libgodot-cpp.ios.template_debug.xcframework": ""
}
ios.release = {
    "res://bin/libgodot-cpp.ios.template_release.xcframework": ""
}
This file contains a configuration section that controls the entry function of the module.
You should also set the minimum compatible Godot version with compatibility_minimum,
which prevents older version of Godot from trying to load your extension.
The reloadable flag enables automatic reloading of your extension by the editor every time you recompile it,
without needing to restart the editor. This only works if you compile your extension in debug mode (default).
libraries 部分很重要:它的作用是告诉 Godot 各个支持的平台对应的动态库在项目文件系统中的位置。因此导出项目时,也只会导出对应的文件,也就是说,数据包中不会包含与目标平台不兼容的库文件。
最后,你可以在 dependencies 部分中列出需要额外包含的动态库。如果你的 GDExtension 插件实现了他人的库,需要在项目中提供第三方动态库的话,就会用到这个部分。
以下是另一个检查正确文件结构的概述:
gdextension_cpp_example/
|
+--demo/                  # game example/demo to test the extension
|   |
|   +--main.tscn
|   |
|   +--bin/
|       |
|       +--gdexample.gdextension
|
+--godot-cpp/             # C++ bindings
|
+--src/                   # source code of the extension we are building
|   |
|   +--register_types.cpp
|   +--register_types.h
|   +--gdexample.cpp
|   +--gdexample.h
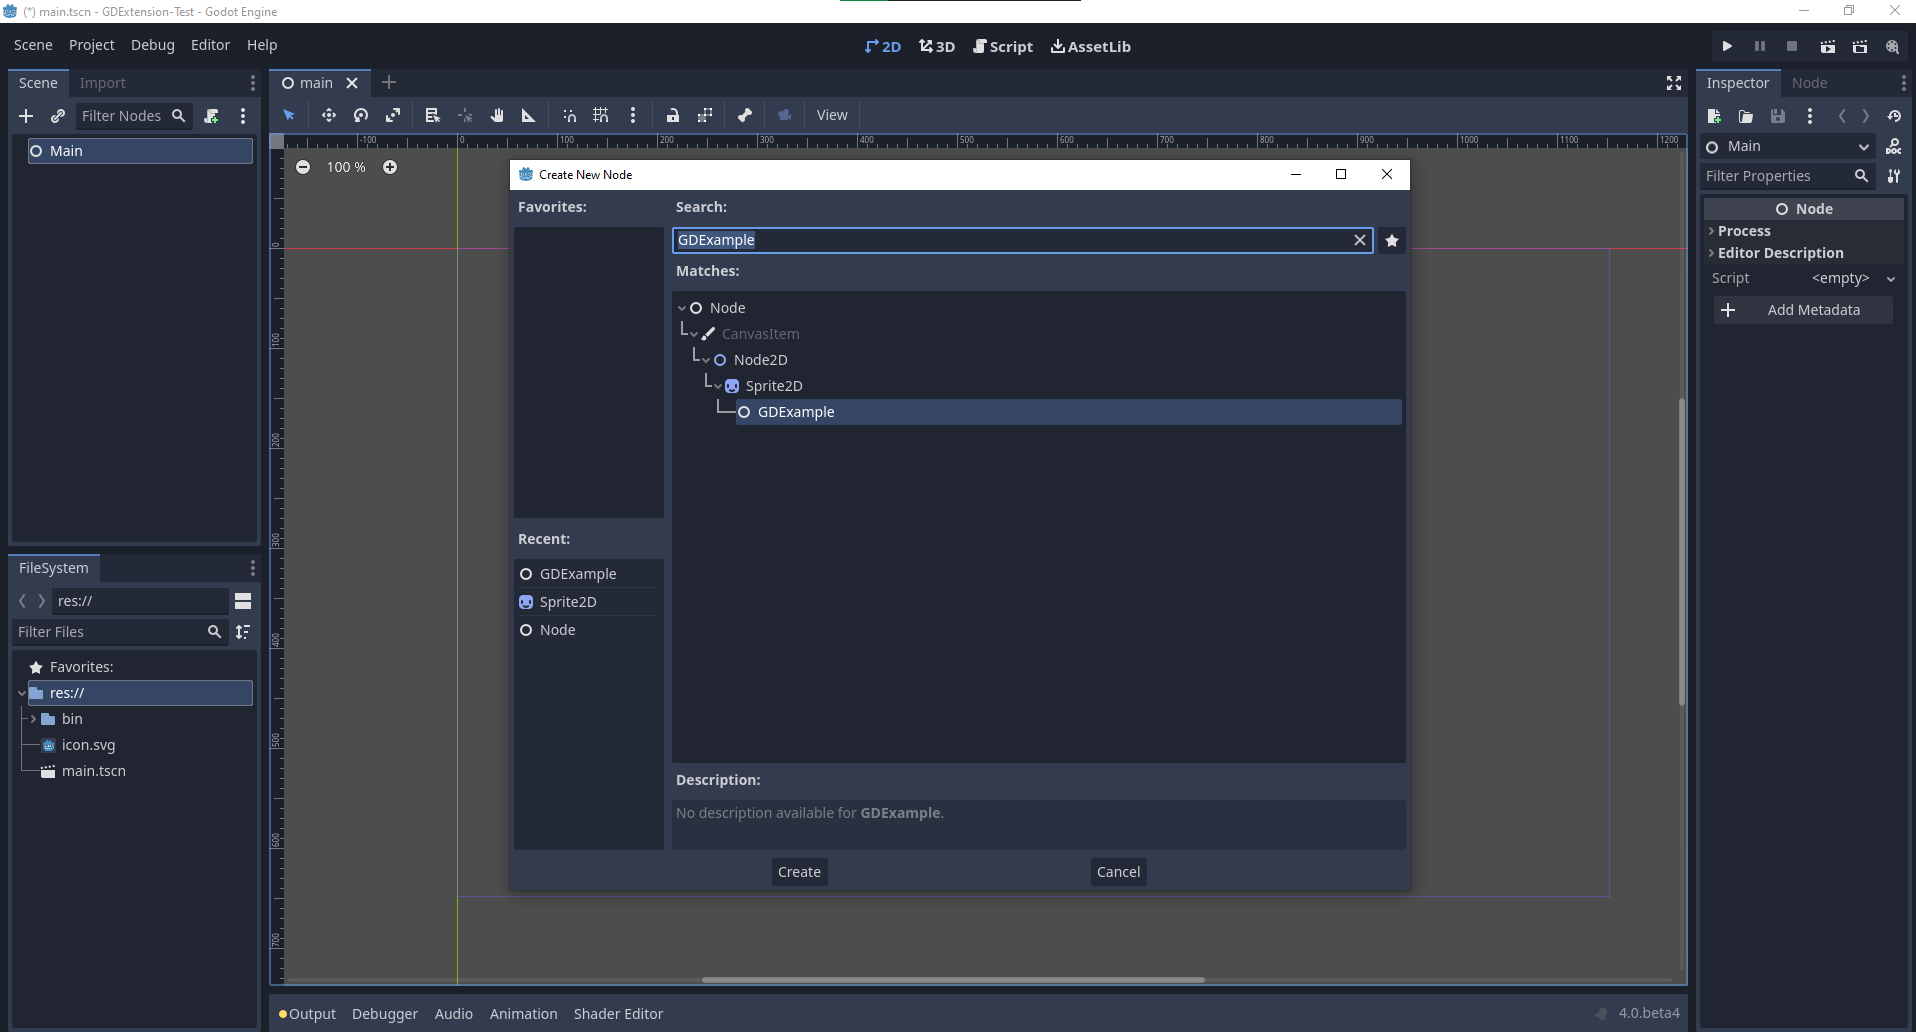
Time to jump back into Godot. We load up the main scene we created way back in the beginning and now add a newly available GDExample node to the scene:
We're going to assign the Godot logo to this node as our texture, disable the
centered property:
我们终于准备好运行这个项目了:
添加属性
GDScript allows you to add properties to your script using the export
keyword. In GDExtension you have to register the properties with a getter and
setter function or directly implement the _get_property_list, _get and
_set methods of an object (but that goes far beyond the scope of this
tutorial).
Lets add a property that allows us to control the amplitude of our wave.
In our gdexample.h file we need to add a member variable and getter and setter
functions:
...
private:
    double time_passed;
    double amplitude;

public:
    void set_amplitude(const double p_amplitude);
    double get_amplitude() const;
...
在我们的 gdexample.cpp 文件中, 我们需要进行一些更改, 我们只会显示我们最终更改的方法, 不要删除我们省略的行:
void GDExample::_bind_methods() {
    ClassDB::bind_method(D_METHOD("get_amplitude"), &GDExample::get_amplitude);
    ClassDB::bind_method(D_METHOD("set_amplitude", "p_amplitude"), &GDExample::set_amplitude);

    ADD_PROPERTY(PropertyInfo(Variant::FLOAT, "amplitude"), "set_amplitude", "get_amplitude");
}

GDExample::GDExample() {
    // Initialize any variables here.
    time_passed = 0.0;
    amplitude = 10.0;
}

void GDExample::_process(double delta) {
    time_passed += delta;

    Vector2 new_position = Vector2(
        amplitude + (amplitude * sin(time_passed * 2.0)),
        amplitude + (amplitude * cos(time_passed * 1.5))
    );

    set_position(new_position);
}

void GDExample::set_amplitude(const double p_amplitude) {
    amplitude = p_amplitude;
}

double GDExample::get_amplitude() const {
    return amplitude;
}
使用这些更改编译模块后,就会看到界面上加入了一个属性。你现在可以更改此属性,当运行项目时,你将看到我们的 Godot 图标沿着更大的数字移动。
让我们做同样的事情但是为了我们动画的速度并使用 setter 和 getter 函数。我们的 gdexample.h 头文件再次只需要几行代码:
...
    double amplitude;
    double speed;
...
    void _process(double delta) override;
    void set_speed(const double p_speed);
    double get_speed() const;
...
这需要对我们的 gdexample.cpp 文件进行一些更改, 同样我们只显示已更改的方法, 所以不要删除我们忽略的任何内容:
void GDExample::_bind_methods() {
    ...
    ClassDB::bind_method(D_METHOD("get_speed"), &GDExample::get_speed);
    ClassDB::bind_method(D_METHOD("set_speed", "p_speed"), &GDExample::set_speed);

    ADD_PROPERTY(PropertyInfo(Variant::FLOAT, "speed", PROPERTY_HINT_RANGE, "0,20,0.01"), "set_speed", "get_speed");
}

GDExample::GDExample() {
    time_passed = 0.0;
    amplitude = 10.0;
    speed = 1.0;
}

void GDExample::_process(double delta) {
    time_passed += speed * delta;

    Vector2 new_position = Vector2(
        amplitude + (amplitude * sin(time_passed * 2.0)),
        amplitude + (amplitude * cos(time_passed * 1.5))
    );

    set_position(new_position);
}

...

void GDExample::set_speed(const double p_speed) {
    speed = p_speed;
}

double GDExample::get_speed() const {
    return speed;
}
Now when the project is compiled, we'll see another property called speed. Changing its value will make the animation go faster or slower. Furthermore, we added a property range which describes in which range the value can be. The first two arguments are the minimum and maximum value and the third is the step size.
备注
For simplicity, we've only used the hint_range of the property method. There are a lot more options to choose from. These can be used to further configure how properties are displayed and set on the Godot side.
信号
Last but not least, signals fully work in GDExtension as well. Having your extension
react to a signal given out by another object requires you to call connect
on that object. We can't think of a good example for our wobbling Godot icon, we
would need to showcase a far more complete example.
这是必需的语法:
some_other_node->connect("the_signal", Callable(this, "my_method"));
To connect our signal the_signal from some other node with our method
my_method, we need to provide the connect method with the name of the signal
and a Callable. The Callable holds information about an object on which a method
can be called. In our case, it associates our current object instance this with the
method my_method of the object. Then the connect method will add this to the
observers of the_signal. Whenever the_signal is now emitted, Godot knows which
method of which object it needs to call.
请注意,只有在 _bind_methods 方法中注册之后才能调用 my_method。否则 Godot 无法得知 my_method 的存在。
想要进一步了解 Callable 请参考 Callable。
让对象发出信号更为常见。对于我们摇摆不定的 Godot 图标,我们会做一些愚蠢的事情来展示它是如何工作的。每过一秒钟我们就会发出一个信号并传递新的位置。
在我们的 gdexample.h 头文件中,我们需要定义一个新成员 time_emit:
...
    double time_passed;
    double time_emit;
    double amplitude;
...
gdexample.cpp 这次的修改有点复杂。首先,你需要在我们的 _init 方法或构造函数中设置 time_emit = 0.0。另外两个修改我们将逐一查看。
In our _bind_methods method, we need to declare our signal. This is done
as follows:
void GDExample::_bind_methods() {
    ...
    ADD_PROPERTY(PropertyInfo(Variant::FLOAT, "speed", PROPERTY_HINT_RANGE, "0,20,0.01"), "set_speed", "get_speed");

    ADD_SIGNAL(MethodInfo("position_changed", PropertyInfo(Variant::OBJECT, "node"), PropertyInfo(Variant::VECTOR2, "new_pos")));
}
在这里,我们的 ADD_SIGNAL 宏可以通过一个包含 MethodInfo 参数的单次调用来实现。MethodInfo 的第一个参数是信号的名称,剩下的参数是 PropertyInfo 类型,描述方法每个参数的基本信息。PropertyInfo 参数通过定义参数的数据类型,以及参数的默认名称来进行说明。
So here, we add a signal, with a MethodInfo which names the signal "position_changed". The
PropertyInfo parameters describe two essential arguments, one of type Object, the other
of type Vector2, respectively named "node" and "new_pos".
接下来我们需要修改我们的 _process 方法:
void GDExample::_process(double delta) {
    time_passed += speed * delta;

    Vector2 new_position = Vector2(
        amplitude + (amplitude * sin(time_passed * 2.0)),
        amplitude + (amplitude * cos(time_passed * 1.5))
    );

    set_position(new_position);

    time_emit += delta;
    if (time_emit > 1.0) {
        emit_signal("position_changed", this, new_position);

        time_emit = 0.0;
    }
}
经过一秒钟后, 我们发出信号并重置我们的计数器。我们可以将参数值直接添加给 emit_signal。
Once the GDExtension library is compiled, we can go into Godot and select our sprite node. In the Node dock, we can find our new signal and link it up by pressing the Connect button or double-clicking the signal. We've added a script on our main node and implemented our signal like this:
extends Node

func _on_Sprite2D_position_changed(node, new_pos):
    print("The position of " + node.get_class() + " is now " + str(new_pos))
每一秒,我们都会将我们的位置输出到控制台。
下一步
We hope the above example showed you the basics. You can build upon this example to create full-fledged scripts to control nodes in Godot using C++.