你的第一个 3D 着色器
你已经决定开始编写一个自定义 Spatial 着色器。或许你在网上看到一个很酷的着色器技巧,或许你发现 StandardMaterial3D 并不能完全满足你的需求。总之,你决定写一个自己的,你想弄清楚从哪里开始。
这个教程将说明如何编写空间着色器, 并将涵盖比 CanvasItem 更多的主题.
空间着色器比CanvasItem着色器有更多的内置功能. 对空间着色器的期望是:Godot为常见的用例提供了功能, 用户仅需在着色器中设置适当的参数. 这对于PBR(基于物理的渲染)工作流来说尤其如此.
这个教程分为两个部分。在第一部分中,我们会使用在 vertex 函数中根据高度图进行顶点位移,从而制作地形。在第二部分中,我们会使用这个脚本中涉及的概念在片断着色器中设置自定义材质,编写海洋水体着色器。
备注
这个教程假定你对着色器中的类型(vec2、float、sampler2D)和函数等基础知识有一定的了解。如果你对这些概念摸不着头脑,那么在完成这个教程之前,你最好先从《着色器之书》 <https://thebookofshaders.com/?lan=ch>获取一些基本知识。
在何处设定材质
In 3D, objects are drawn using Meshes. Meshes are a resource type that store geometry (the shape of your object) and materials (the color and how the object reacts to light) in units called "surfaces". A Mesh can have multiple surfaces, or just one. Typically, you would import a mesh from another program (e.g. Blender). But Godot also has a few PrimitiveMeshes that allow you to add basic geometry to a scene without importing Meshes.
There are multiple node types that you can use to draw a mesh. The main one is MeshInstance3D, but you can also use GPUParticles3D, MultiMeshes (with a MultiMeshInstance3D), or others.
Typically, a material is associated with a given surface in a mesh, but some nodes, like MeshInstance3D, allow you to override the material for a specific surface, or for all surfaces.
如果你在表面或网格本身上设置了材质,那么所有共享该网格的 MeshInstance3D 都共享该材质。但是如果你想在多个网格实例中重用同一个网格,而每个实例又要具有不同的材质,那么你就应该在 MeshInstance3D 上设置材质。
For this tutorial we will set our material on the mesh itself rather than taking advantage of the MeshInstance3D's ability to override materials.
设置
向场景添加一个新的 MeshInstance3D 节点。
In the inspector tab, set the MeshInstance3D's Mesh property to a new
PlaneMesh resource, by clicking on <empty> and
choosing New PlaneMesh. Then expand the resource by clicking on the image of
a plane that appears.
This adds a plane to our scene.
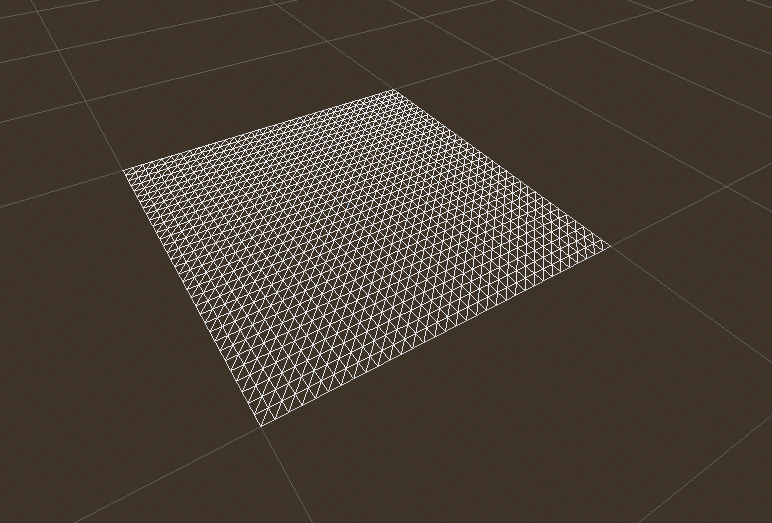
Then, in the viewport, click in the upper left corner on the Perspective button. In the menu that appears, select Display Wireframe.
这将允许你查看构成平面的三角形.

Now set Subdivide Width and Subdivide Depth of the PlaneMesh to 32.
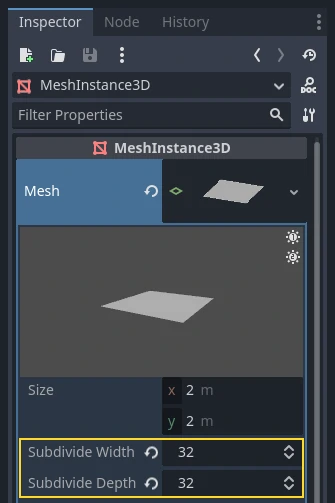
You can see that there are now many more triangles in the MeshInstance3D. This will give us more vertices to work with and thus allow us to add more detail.
PrimitiveMeshes, like PlaneMesh, only have one surface, so instead of an array of materials there is only one. Set the Material to a new ShaderMaterial, then expand the material by clicking on the sphere that appears.
备注
Materials that inherit from the Material resource, such as StandardMaterial3D and ParticleProcessMaterial, can be converted to a ShaderMaterial and their existing properties will be converted to an accompanying text shader. To do so, right-click on the material in the FileSystem dock and choose Convert to ShaderMaterial. You can also do so by right-clicking on any property holding a reference to the material in the inspector.
Now set the material's Shader to a new Shader by clicking <empty> and
select New Shader.... Leave the default settings, give your shader a name,
and click Create.
Click on the shader in the inspector, and the shader editor should now pop up. You are ready to begin writing your first Spatial shader!
着色器魔术
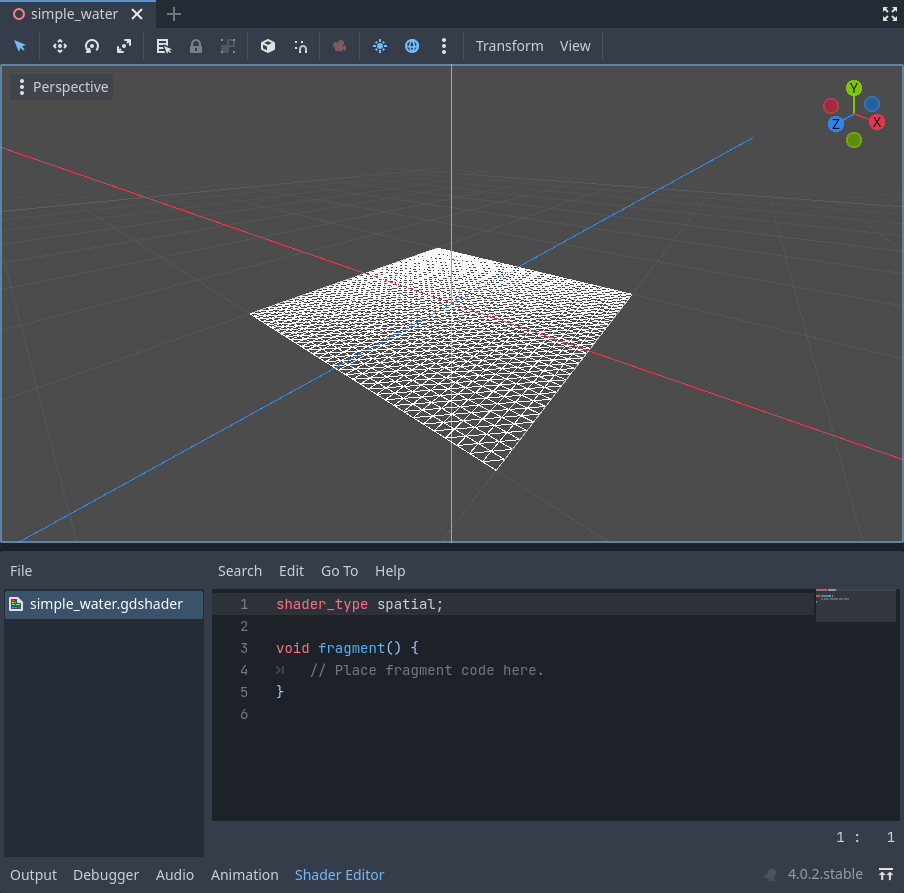
The new shader is already generated with a shader_type variable, the
vertex() function, and the fragment() function. The first thing Godot
shaders need is a declaration of what type of shader they are. In this case the
shader_type is set to spatial because this is a spatial shader.
shader_type spatial;
The vertex() function determines where the vertices of your MeshInstance3D
appear in the final scene. We will be using it to offset the height of each vertex
and make our flat plane appear like a little terrain.
With nothing in the vertex() function, Godot will use its default vertex
shader. We can start to make changes by adding a single line:
void vertex() {
  VERTEX.y += cos(VERTEX.x) * sin(VERTEX.z);
}
添加此行后, 你应该会得到类似下方的图像.

Okay, let's unpack this. The y value of the VERTEX is being increased.
And we are passing the x and z components of the VERTEX as arguments
to cos() and sin(); that gives
us a wave-like appearance across the x and z axes.
What we want to achieve is the look of little hills; after all. cos() and
sin() already look kind of like hills. We do so by scaling the inputs to the
cos() and sin() functions.
void vertex() {
  VERTEX.y += cos(VERTEX.x * 4.0) * sin(VERTEX.z * 4.0);
}
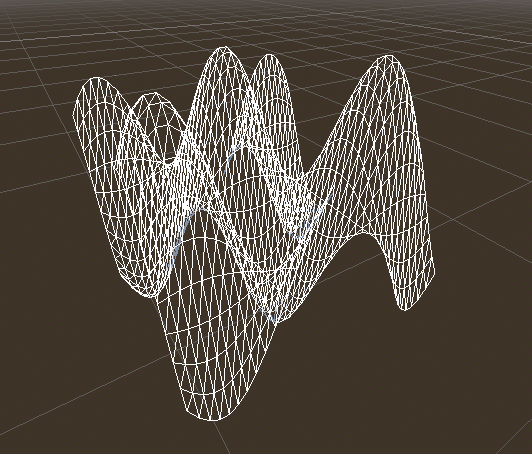
看起来效果好了一些, 但它仍然过于尖锐和重复, 让我们把它变得更有趣一点.
噪声高度图
噪声是一种非常流行的伪造地形的工具. 可以认为它和余弦函数一样生成重复的小山, 只是在噪声的影响下每个小山都拥有不同的高度.
Godot provides the NoiseTexture2D resource for generating a noise texture that can be accessed from a shader.
要在着色器中访问纹理,请在着色器顶部附近、vertex() 函数外部添加以下代码。
uniform sampler2D noise;
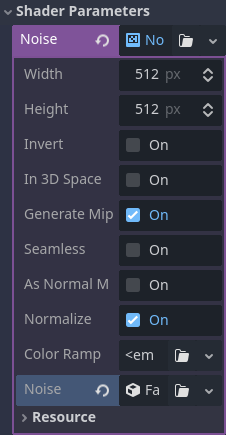
This will allow you to send a noise texture to the shader. Now look in the inspector under your material. You should see a section called Shader Parameters. If you open it up, you'll see a parameter called "Noise".
Set this Noise parameter to a new NoiseTexture2D. Then in your NoiseTexture2D, set its Noise property to a new FastNoiseLite. The FastNoiseLite class is used by the NoiseTexture2D to generate a heightmap.
设置好后, 看起来应该像这样.
Now, access the noise texture using the texture() function:
void vertex() {
  float height = texture(noise, VERTEX.xz / 2.0 + 0.5).x;
  VERTEX.y += height;
}
texture() takes a texture as the first argument and
a vec2 for the position on the texture as the second argument. We use the
x and z channels of VERTEX to determine where on the texture to look
up.
Since the PlaneMesh coordinates are within the [-1.0, 1.0] range (for a size
of 2.0), while the texture coordinates are within [0.0, 1.0], to remap
the coordinates we divide by the size of the PlaneMesh by 2.0 and add
0.5 .
texture() returns a vec4 of the r, g, b, a channels at the position.
Since the noise texture is grayscale, all of the values are the same, so we can
use any one of the channels as the height. In this case we'll use the r, or
x channel.
备注
xyzw is the same as rgba in GLSL, so instead of texture().x
above, we could use texture().r. See the OpenGL documentation for more
details.
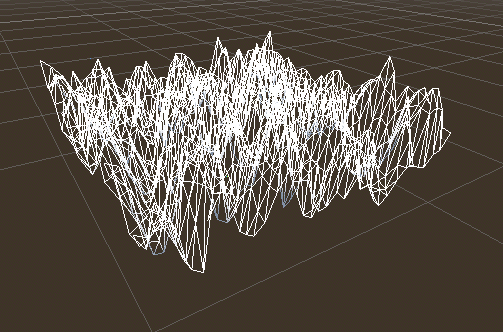
使用此代码后, 你可以看到纹理创建了随机外观的山峰.
目前它还很尖锐, 我们需要稍微柔化一下山峰. 这将用到uniform值. 你在之前已经使用了uniform 值来传递噪声纹理, 现在让我们来学习一下其中的工作原理.
Uniform
Uniform variables allow you to pass data
from the game into the shader. They are
very useful for controlling shader effects. Uniforms can be almost any datatype
that can be used in the shader. To use a uniform, you declare it in your
Shader using the keyword uniform.
让我们做一个改变地形高度的uniform.
uniform float height_scale = 0.5;
Godot lets you initialize a uniform with a value; here, height_scale is set
to 0.5. You can set uniforms from GDScript by calling the function
set_shader_parameter()
on the material corresponding to the shader. The value passed from GDScript
takes precedence over the value used to initialize it in the shader.
# called from the MeshInstance3D
mesh.material.set_shader_parameter("height_scale", 0.5)
备注
Changing uniforms in Spatial-based nodes is different from
CanvasItem-based nodes. Here, we set the material inside the PlaneMesh
resource. In other mesh resources you may need to first access the
material by calling surface_get_material(). While in the
MeshInstance3D you would access the material using
get_surface_material() or material_override.
Remember that the string passed into set_shader_parameter() must match the name
of the uniform variable in the shader. You can use the
uniform variable anywhere inside your shader. Here, we will
use it to set the height value instead of arbitrarily multiplying by 0.5.
VERTEX.y += height * height_scale;
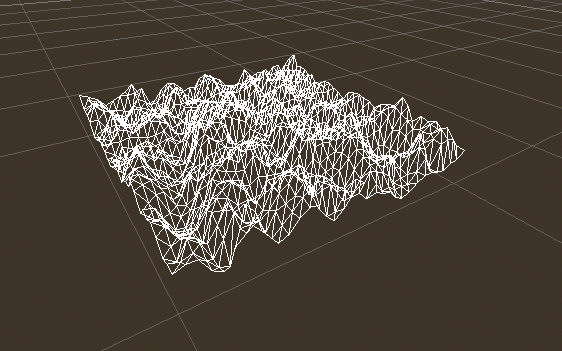
现在它看起来好多了.
Using uniforms, we can even change the value every frame to animate the height of the terrain. Combined with Tweens, this can be especially useful for animations.
与光交互
First, turn wireframe off. To do so, open the Perspective menu in the upper-left of the viewport again, and select Display Normal. Additionally in the 3D scene toolbar, turn off preview sunlight.
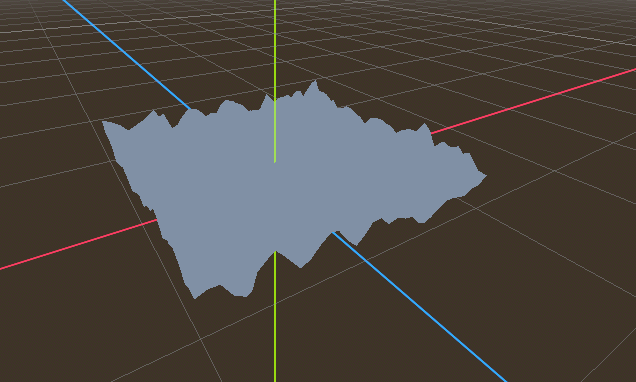
注意网格颜色是如何变得平滑的. 这是因为它的光线是平滑的. 让我们加一盏灯吧!
First, we will add an OmniLight3D to the scene, and drag it up so it is above the terrain.
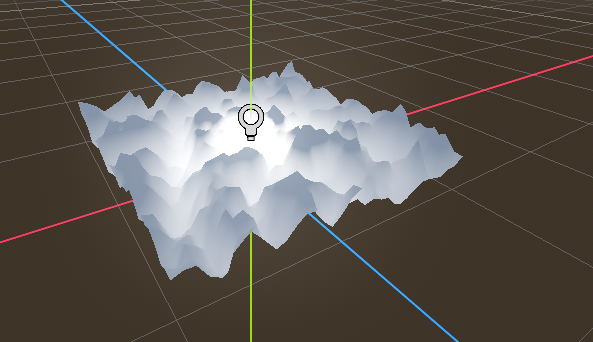
你会看到光线影响了地形, 但这看起来很奇怪. 问题是光线对地形的影响就像在平面上一样. 这是因为光着色器使用 网格 中的法线来计算光.
法线存储在网格中, 但是我们在着色器中改变网格的形状, 所以法线不再正确. 为了解决这个问题, 我们可以在着色器中重新计算法线, 或者使用与我们的噪声相对应的法线纹理.Godot让这一切变得很简单.
你可以在顶点函数中手动计算新的法线,然后只需设置法线 NORMAL。设置好 NORMAL 后,Godot 将为我们完成所有困难的光照计算。我们将在本教程的下一部分介绍这种方法,现在我们将从纹理中读取法线。
相反, 我们将再次依靠噪声来计算法线. 我们通过传入第二个噪声纹理来做到这一点.
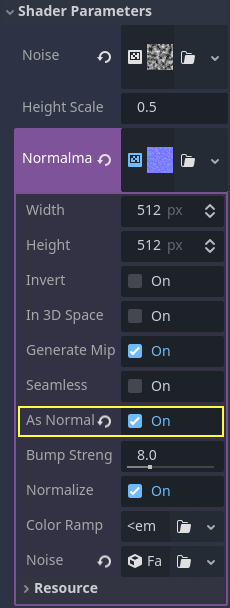
uniform sampler2D normalmap;
Set this second uniform texture to another NoiseTexture2D with another FastNoiseLite. But this time, check As Normal Map.
When we have normals that correspond to a specific vertex we set NORMAL, but
if you have a normalmap that comes from a texture, set the normal using
NORMAL_MAP in the fragment() function. This way Godot will handle
wrapping the texture around the mesh automatically.
Lastly, in order to ensure that we are reading from the same places on the noise
texture and the normalmap texture, we are going to pass the VERTEX.xz
position from the vertex() function to the fragment() function. We do
that using a varying.
Above the vertex() define a varying vec2 called tex_position. And
inside the vertex() function assign VERTEX.xz to tex_position.
varying vec2 tex_position;

void vertex() {
  tex_position = VERTEX.xz / 2.0 + 0.5;
  float height = texture(noise, tex_position).x;
  VERTEX.y += height * height_scale;
}
现在我们可以从 fragment() 函数中访问 tex_position .
void fragment() {
  NORMAL_MAP = texture(normalmap, tex_position).xyz;
}
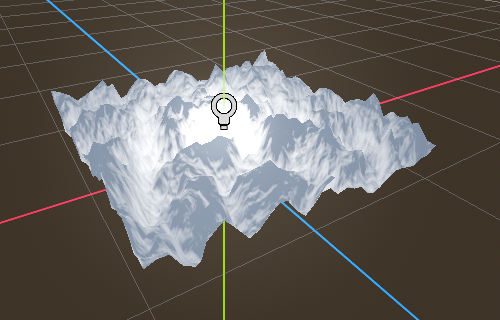
法线就位后, 光线就会对网格的高度做出动态反应.
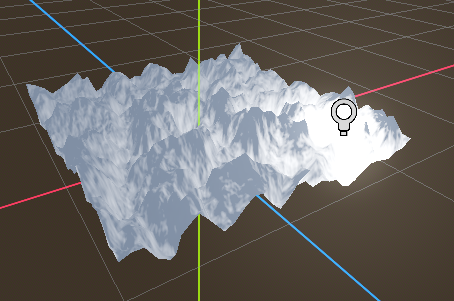
我们甚至可以把灯拖来拖去, 灯光会自动更新.
Full code
以下是本教程的完整代码. 你可以看到,Godot会为你处理大多数繁琐的事情, 本教程篇幅不会太长.
shader_type spatial;

uniform float height_scale = 0.5;
uniform sampler2D noise;
uniform sampler2D normalmap;

varying vec2 tex_position;

void vertex() {
  tex_position = VERTEX.xz / 2.0 + 0.5;
  float height = texture(noise, tex_position).x;
  VERTEX.y += height * height_scale;
}

void fragment() {
  NORMAL_MAP = texture(normalmap, tex_position).xyz;
}
这就是这部分的全部内容. 希望你现在已了解Godot中顶点着色器的基本知识. 在本教程的下一部分中, 我们将编写一个片段函数来配合这个顶点函数, 并且我们将介绍一种更高级的技术来将这个地形转换成一个移动的波浪海洋.